Inspired by our vacation in Napa Valley, California - my family asked me to make a dinner to celebrate. (Bear in mind this was intended for a collection of five picky palates.) I am happy to say I came up with a real sunshine-inspired crowd pleaser! Granted...I ended up with a triple serving of veggies in mine after my younger brothers modified their plates. ;)
Pasta California - feeds 5-6
Ingredients:
- 1 lb Rigatoni, or other short pasta with space to catch the sauce
- 2 cups chopped Chicken
- 2 cups chopped Broccoli
- 1 cup chopped Red Bell Pepper
- 1/2 cup chopped Onion (yellow)
- 1/2 chopped/sliced Mushrooms
- 2-3 cloves diced Garlic
- 1 jar Classico Sun-Dried Tomato Alfredo
Boil the pasta until al dente.
Meanwhile - in a saucepan over med-hi heat, put 2-3 tablespoons of good olive oil, and add the onion, mushrooms, and garlic right away.* Let these simmer until the onions are golden translucent and very soft, stirring and adding a few tablespoons of water periodically.
Next, add your chopped chicken and saute until almost cooked through.
Add the broccoli and cook until the chicken is done and broccoli is the consistency you prefer.
Add the bell pepper last so it maintains its crunch, which adds nice depth of texture to the dish.
Fold in with the drained rigatoni and jar of sauce. Let sit for at least 5 minutes on low heat, stirring regularly, to allow the flavors to blend.
Serve with warm bread, herbed olive oil for dipping, and a salad! We chose caprese salad in lieu of lettuce - sliced red tomatoes, topped with sliced fresh buffalo mozzarella, and sprinkled with basil, salt, pepper, and olive oil.
Happy Eating!
*Note - Olive oil is my very favorite and I use it for everything. However - it is important to remember that it does not tolerate high heat very well. So if you are using virgin or extra virgin to saute foods on high heat, you must heat the pan first, then add the oil and foods together. This way, the oil isn't allowed to burn in the pan. Olive oil should never be allowed to smoke in the pan by itself.
Monday, June 20, 2011
Friday, June 17, 2011
Homemade Aioli Sauce
Anything fatty and creamy is right up my alley - custard, cheesecake, butter, gravy. If follows, then, that I love mayonnaise. Love. But I hate manufactured pre-fab food, and love simple, cheap, quality, artisan food. Dilemma.
Solution? Homemade Aioli! Now, homemade mayonnaise flavored with garlic and/or herbs is called Aioli sauce. There are many varieties of this - some even including pears! My favorite recipe is made with classic herbs, making it very versatile. This sauce is amazing on sandwiches, with seafood, with steak, tossed with steamed veggies...use your imagination!
Some chemistry: yes! science in the kitchen! my favorite. What we're really trying to do here is emulsify or blend together two things that don't really want to mix. Like oil and water. Egg yolk, lemon juice, and garlic all act as emulsifiers, which will allow the oil you mix in to break down into micro-droplets and make the yummy creamy sauce you're looking for. Cool.
Now - take your time, be wowed by science, and don't be afraid!
Homemade Aioli
Ingredients: 1 egg yolk, 1/2 cup olive oil (or other oil you like the taste of), and 1/2 tablespoon lemon juice. Pinch of sea salt, dash of garlic powder (or mashed small garlic clove), dash of mustard powder, and 2 fresh rosemary leaves chopped finely.
You begin with an egg yolk. I like to roll the egg yolk in my (clean) hands first to remove all white, then break the yolk and letting it drain into my bowl, leaving the membrane in my fingers to throw away. Not a huge difference, but I find I get a smoother sauce that whips more easily without that membrane.
So. Clean bowl. One egg yolk. You may grind a garlic clove into a paste and add it now, or just add garlic powder for flavor later. Begin whipping - I do this by hand, some use a food processor or blender. Add one drop of quality olive oil, or other oil that you like the taste of, and whip whip whip. Add one drop of lemon juice, whip. Drop of oil, whip. Drop of juice, whip.
Now you can begin to add a few drops of oil and one drop of juice, whipping all the time to keep it blended. When you see the oil separate from the creamy base- stop adding and begin whipping. If it will not come together, try adding a second egg yolk, or just scrap it and start over.
Continue blending in small increments of oil and juice until all is combined. Ta-da!
Now - for extra flavor. Mix in your sea salt, garlic powder, mustard powder, and chopped rosemary. I like to smash the rosemary into the bowl first to release all its aromatics.
Enjoy :)
All in all - maybe 15 minutes? Totally worth it for an amazing, gourmet sauce using ingredients you already have. Win.
Happy Eating!
Solution? Homemade Aioli! Now, homemade mayonnaise flavored with garlic and/or herbs is called Aioli sauce. There are many varieties of this - some even including pears! My favorite recipe is made with classic herbs, making it very versatile. This sauce is amazing on sandwiches, with seafood, with steak, tossed with steamed veggies...use your imagination!
Some chemistry: yes! science in the kitchen! my favorite. What we're really trying to do here is emulsify or blend together two things that don't really want to mix. Like oil and water. Egg yolk, lemon juice, and garlic all act as emulsifiers, which will allow the oil you mix in to break down into micro-droplets and make the yummy creamy sauce you're looking for. Cool.
Now - take your time, be wowed by science, and don't be afraid!
Homemade Aioli
Ingredients: 1 egg yolk, 1/2 cup olive oil (or other oil you like the taste of), and 1/2 tablespoon lemon juice. Pinch of sea salt, dash of garlic powder (or mashed small garlic clove), dash of mustard powder, and 2 fresh rosemary leaves chopped finely.
You begin with an egg yolk. I like to roll the egg yolk in my (clean) hands first to remove all white, then break the yolk and letting it drain into my bowl, leaving the membrane in my fingers to throw away. Not a huge difference, but I find I get a smoother sauce that whips more easily without that membrane.
So. Clean bowl. One egg yolk. You may grind a garlic clove into a paste and add it now, or just add garlic powder for flavor later. Begin whipping - I do this by hand, some use a food processor or blender. Add one drop of quality olive oil, or other oil that you like the taste of, and whip whip whip. Add one drop of lemon juice, whip. Drop of oil, whip. Drop of juice, whip.
Now you can begin to add a few drops of oil and one drop of juice, whipping all the time to keep it blended. When you see the oil separate from the creamy base- stop adding and begin whipping. If it will not come together, try adding a second egg yolk, or just scrap it and start over.
Continue blending in small increments of oil and juice until all is combined. Ta-da!
Enjoy :)
All in all - maybe 15 minutes? Totally worth it for an amazing, gourmet sauce using ingredients you already have. Win.
Happy Eating!
Thursday, June 16, 2011
Champagne Tea
My girl Julie's birthday is this Saturday and I won't be around to celebrate it with her!!! Tragedy.
So. We celebrated yesterday :) And what did we do? Foods. Champagnes. Makeups. Dress-up (in Betsey Johnson!) and a stroll around town hand in hand. Fantastic night for both of us.
Of course...since she and I are so similar...we couldn't just have chips and salsa!
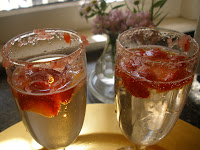
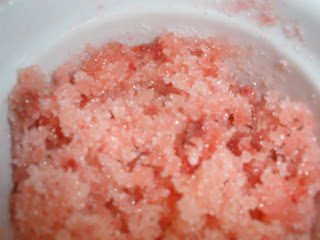
strawberry sugar (to rim the champagne flutes)
strawberry syrup (also for the champagne)
champagne ;)
&
tea sandwiches!
&
tea sandwiches!

 Strawberry sugar:
I added about 1 medium strawberry, chopped up, to about 1/2 cup of white sugar. Mix, and viola!
bubbles!
Tea sandwiches (on a skinny french loaf):
- fresh mozzarella + basil + tomato
- prosciutto + fresh parmesan reggiano
- fresh aioli sauce + cucumber
- bosc pear + blue cheese + honey
We decided to do some traditional, some creative. The best thing about tea sandwiches - they're small so you can make (and eat) lots!
What an amazing night. Love you Julie!
Thursday, June 9, 2011
Read Poetry
I have lost my smile,
but don't worry.
The dandelion has it.
-from Peace Is Every Step, Thich Nhat Hanh
I keep my shell collection on the beach.
It looks better there.
Friday, June 3, 2011
The Bagged Lunch Dilemma
To bring, or not to bring? The classic question. Why do we feel so much freedom regarding dinner, and so limited regarding lunch? Many workplaces have access to both a refrigerator and a microwave. Even if you have neither - you are not relegated to a PB&J with a bag of doritos!
My happy accident today: I have no food. Well, very little. Literally: old potatoes, lettuce, some tofu, the bottom of the almond butter jar, and frozen fish, plus random pantry items. So I sadly decided I would have plain oatmeal for lunch. But wait - are those unsweetened coconut flakes?
::brain wheels turning...::
I ended up with a tupperware with the following dumped into it: piece of frozen salmon. 2 tbsp almond butter. 1/4c unsweetened coconut flakes. A dash of garlic powder. A dash of sriracha chili sauce. A dash of soy sauce. A splash of water. ::fingers crossed:: ...microwave x4 minutes.
Viola. Thai Coconut Salmon.
Delicious, wholesome, nutritious, very fast, lunch. That was not plain oatmeal. And took less time to do than a pb&j.
Bottom line - get creative with your lunches. There is no excuse to eat pre-packaged garbages that do nothing for your body and eat away your soul! I'll write more on this topic later and try to come up with some quick delicious bagged lunch meal ideas.
"When you already know you're on the right track, all you have to do is keep walking."
Curry in a Hurry
So studying for boards is ramping up and I'm beginning to feel the heat - which translates to some awesome heat in the kitchen too! My friend Rachel is coming over tonight for a dinner & study date. With our ingredients combined..we've come up with this yummy (quick and easy) curry!
I've made a number of curry dishes, but I've learned from the origins of curry that it's best to make the sauce separately, then pour it on the food you're cooking (either while cooking or after as a sauce)
My improvised curry sauce:
- Cook whatever meat you're using with 1 cup of water. I used shrimp. Drain the water into a blender (make sure it was thoroughly cooked before doing this!)
- 1 tsp chili sauce (to taste)
- 1 tablespoon chopped fresh ginger
- 2 cloves garlic
- 1 tbsp lime juice
- 3 tbsp soy sauce
- 3/4 tsp turmeric
- 1/2 tsp ground coriander
- 1 tbsp brown sugar
- 1 can coconut milk (regular or light)
Blend for a good minute. Done! Add flavors as you so desire - I don't include added salt.
I also discovered this freezes very well.
I used it in the following two recipes:
Curry Tofu Stir Fry:
- In a hot cast iron skillet: a few tablespoons of olive oil, a cup of thickly shredded cabbage (any kind), a cup of mushrooms chopped into big pieces/quarters, a cup of cubed tofu, 1 tbsp fresh chopped ginger. Saute until cabbage is tender. I like the heat on high and stirring more frequently to get a caramlized taste.
Add 1 cup of yellow curry sauce and simmer 5 minutes to let the flavors combine. NomNom!
Curry chicken and peppers over rice:
Saute chicken breast strips with coarsely chopped onion and red bell pepper until cooked through. Add 1 cup curry sauce and simmer 5 minutes. Serve over rice.
The possibilities are, if not endless, many more than I could ever be bored with (and that must be a lot).
Happy Currying!
Subscribe to:
Posts (Atom)


